
- Set Up a Wallet: Ensure you have a wallet that supports Arbitrum, such as MetaMask, and it’s connected to the Arbitrum network. If you haven’t set up MetaMask for Arbitrum yet, you can do so by following these steps:
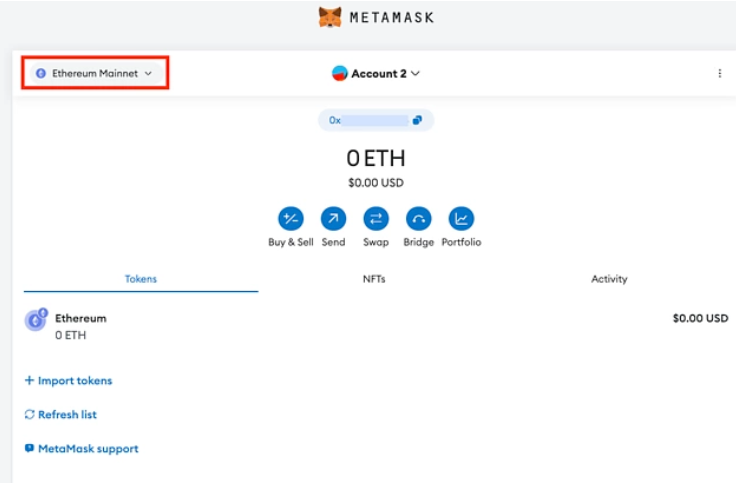
- Open MetaMask and click on your account icon.
- Select the Network dropdown.
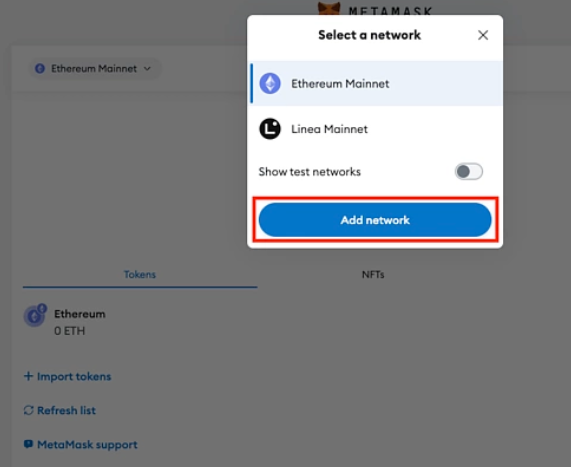
Click on “add network” in the popup menu.
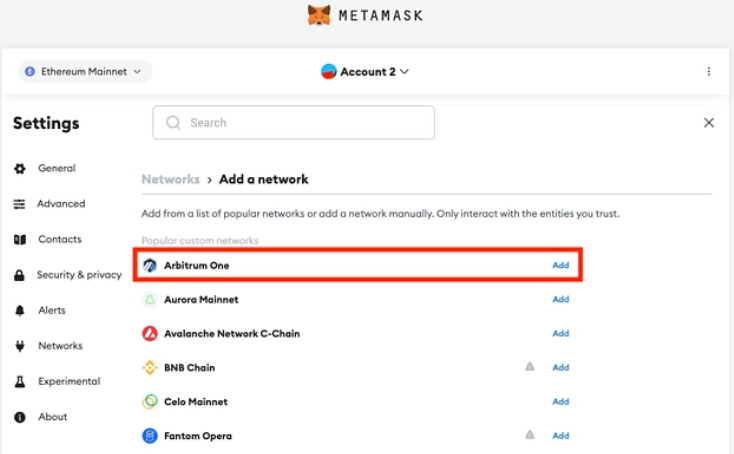
Under popular custom networks, search for Arbitrum One and click add.
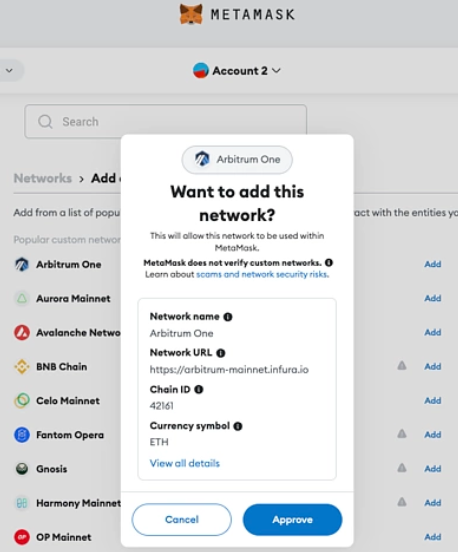
Approve the request to add Arbitrum One to Metamask,
ONCE YOU HAVE COMPLETED ADDING ARBITRUM ONE TO METAMASK YOU CAN FOLLOW THE STEPS BELOW:
- Add Funds: Deposit ETH (for gas fees) into your wallet that’s on the Arbitrum network. You can do this by transferring ETH from another Arbitrum One wallet or exchange to your MetaMask wallet address. Please ensure this ETH is transferred on the Arbitrum One Network when given the option to select.
- Bridge or Buy Arbitrum: If you don’t have Arbitrum tokens (such as ETH) on the Arbitrum network, you’ll need to bridge them from Ethereum mainnet to Arbitrum. Alternatively, you can purchase Arbitrum tokens from a supported exchange and transfer them to your MetaMask wallet on the Arbitrum network.
- Access Uniswap: Go to the Uniswap interface. You can access Uniswap by visiting the website: https://app.uniswap.org/
- Connect Your Wallet: Click on “Connect to a wallet” on the Uniswap interface and select your MetaMask wallet from the list. This will allow Uniswap to access your wallet’s funds for trading.
- Select the $YAKS Token: Obtain the Contract Address (CA) for the $YAKS token. This will only be shared shortly before TGE. Make sure to use the official contract address provided by YakDAO to avoid scams or fake tokens.
- Swap $YAKS: Once you’ve located the $YAKS token on Uniswap, select it from the token list. Enter the amount of ETH you want to swap for $YAKS in the provided input field.
- Confirm the Swap: Double-check all the details of the transaction, including the amount of ETH you’re swapping and the estimated amount of $YAKS you’ll receive. Confirm the swap in your MetaMask wallet by clicking on the “Confirm” or “Swap” button.
- Transaction Confirmation: After confirming the swap, wait for the transaction to be processed. This may take a few minutes depending on the network congestion and gas fees.
- $YAKS Tokens Received: Once the transaction is confirmed, you’ll receive $YAKS tokens in your MetaMask wallet on the Arbitrum network. You can verify the transaction by checking your wallet balance or exploring the transaction details on the Arbitrum block explorer. Congratulations, you’re now a member of the Yaks community!